How to Create the Perfect Eyebrow
- AngryKittyBoutique

- Apr 18, 2019
- 2 min read
Updated: Apr 18, 2019
There are a ton of handy products now that help you get the "perfect eyebrow," but I have found that one of the oldest tools around is the best: the eyebrow stencil. No matter how thick or thin you want to keep your brows, the stencils are nice to help you maintain the perfect natural shape. Here are my steps to get a great eyebrow.

Step 1: Apply face lotion.

Step 2: You will need a long makeup brush or pencil. You will also need a white eyeliner or foundation stick.

Step 3: Marking your size settings.

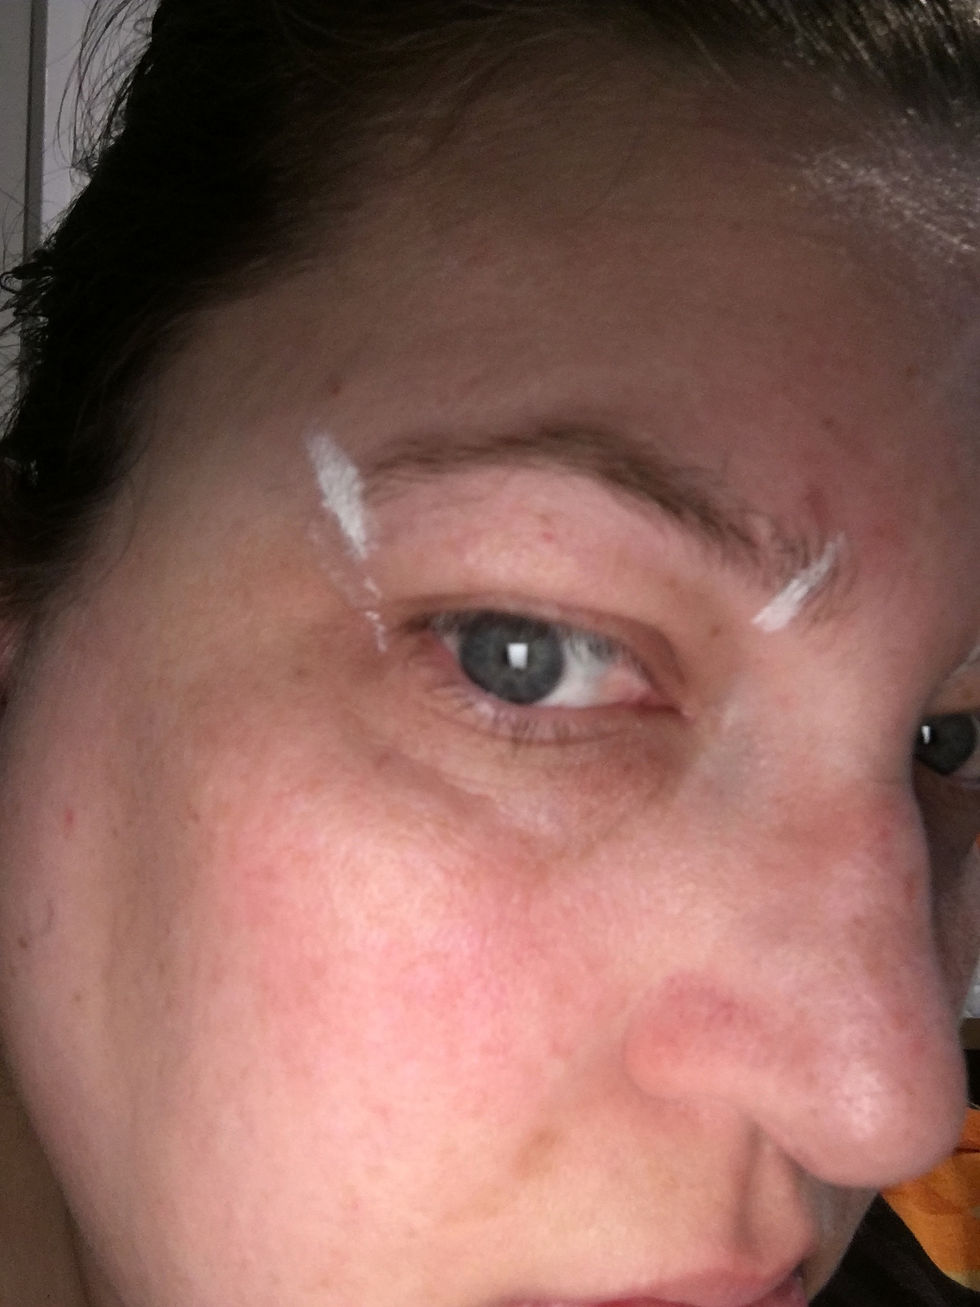
Step 4: Do the same on the other side. When you are done it will look like this.

Step 5: Marking the outside of the brows.

Step 6: Do the other eye. You'll look like this when you're done.
Step 7: Next you need to find the center of your eye to properly align the arch of your eyebrow. This will give you the perfect arch for your eye shape and facial features.


Step 8: Do all of your trimming. Use the white marks as your guide. Anything beyond them should be removed. Use the center line to guide you with cleaning up and reshaping your brow's arch.


Step 9: Checking your work and verifying your shape, with the handy dandy eyebrow stencil. You will also need an eyebrow pencil. I like to get a cheap one that is too dark, so you can really see it's lines.


Step 10: Find the stencil that best match's your own shape, and align the arch with yours. Use the pencil to fill in the stencil hole that is over your brow. Flip the stencil over and do the other eye. Make sure it is nice and thick. Yes, you will feel like a total weirdo clown after!


Step 11: Use your tweezers to clean up the top and bottom of brows. You should also use one of those little scissors to clean up the length of some of the hairs.

Last step 12: Final review. Use clear eyebrow gel to get the eyebrows to behave. I use this when I apply my makeup too. I just helps keep them in line during your daily life. Before they made eyebrow gel, I used to use clear mascara! Once it is applied, see if there are any hairs that are still astray or annoy you, etc.

THE END! All better, so fresh and so clean!

If you like what you see, please SHARE my blog with your friends!
XO, Krista


Comments